Posts

And This Time It's The Oven..

Image
Back in May I wrote about replacing the electronic console on my dual fuel Thermador stove. Recently as I was preparing a meal for a friend of mine, the element in the oven started burning a bright white flame - almost like a welders arc - finally went out and now the oven didn't work. I managed to finish the dinner using my gas grill. Did a little research and decided that replacing the element didn't seem like a big task, so I ordered a replacement from Bosch. THERMADOR RDSS30RS Once the element arrived I compared it to the existing one and it looked right. Was worried since my stove is about 20 years old. Turned off the breaker (stove has 220 volt so you don't want to mess around), pulled out the unit and unplugged it. Had to remove a trim piece at the top and the back panel to get to the electrical wiring. Immediately could see where the old element came through the back and clipped into the wiring. At first I thought the element was soldered but then realized i

Time for a New Stove?

Image
My home came with a very nice duel fuel Thermador slide-in stove. I prefer cooking with gas and baking with electric so this worked very well for me. It has nice heavy duty grates and I've loved everything about it except that the display was very dim making it hard to set the oven temp. The light seemed to be getting dimmer and I resorted to counting up or down from 350 degrees which was the initial set temp when you turned on the oven.  One day I came home from work to find that the display was completely gone and now you couldn't use the oven at all. Immediately I went onto the internet to see what I could find and came to realize that despite the great appliance that I had, one inherit issue was the display. Also came to realize that the display board was no longer available. I did however find out that you could possibly remove the display board and send it to one of several board repair companies. I then researched new appliances and realized that to replace my curren

Ladder Hangers

Image
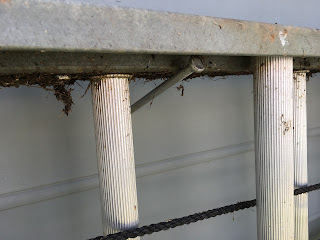
Haven't posted in awhile. Been living life and everything running pretty smoothly. Last weekend we had beautiful spring weather in Virginia so I decided to get my trimmer out and clean up around the place. As I was working my way around the shed it dawned on me that after seven years, I still hadn't gotten around to hanging up my ladders and they were still laying alongside the shed where I left them after I moved in. Grass & weeds grows up between the ladders and I can't get the mower in close enough to trim. One time I even go too close while mowing and I got the extension ladder rope completely tangled around the blades of my riding mower. Took me over an hour to get untangled and now one of the ladders has a very short rope. You think this would have prompted me to do something. So I decided today was the day to see if I could figure out a way to hang them. The obvious thing would be to run to the hardware store and pickup a few sets of the ladder hangers. I howev

And The Kitchen Project Continues...

Image
Now that my kitchen counters were installed it was time to decide on a back splash. I intentionally did not have a granite back splash installed since I was planning on tiling myself. All along I was thinking white subway tile since the counters had so much movement but I still wasn't convinced that an accent tile was also the way to go. Off to the tile store and after about an hour I picked out 3" x 6" white subway with a strip of glass and white quartzite bars set in a 12" x 12" mosaic sheet. With the tiles in my cart I headed to the supply section to get all the other stuff for my project. Besides the tiles, ended up purchasing: White Non-sanded grout (powdered form so I could add grout sealant) Tile adhesive - premixed Grout additive Tile, stone & grout sealant Two large sponges, one with a dehazing pad on one side Tile cutter Tile spacers The only supplies I needed that I already had were various sizes of troughs for the adhesive (including o

And Finally The White Laminate Is Gone!

Image
I've been wanting to replace the counter tops in my kitchen since the day I moved in. Six years later and I finally got around to doing something about it. Stopped in two local granite stores in my town and ordered a gorgeous piece of Fantasy Brown granite when the owner made me an offer I couldn't refuse. He also agreed to remove the old counters for $150. I was planning to do the removal myself but at that price we had a deal. He came to the house that day to take measurements and so my project began. Before picture of kitchen with white laminate counters We made plans for the new counters to be installed the following Saturday but they did not do plumbing so I woke up early that morning to prep the kitchen. I had to remove all the items from the counter, remove the items in the top drawers and disconnect and remove the existing kitchen sink and faucet. The install came with a new sink and I decided to splurge and get a new high arc kitchen faucet even though I ha

Saturday Fun with Chalk Paint

Image
I've done a few refinishing projects with Milk Paint and decided I wanted to give Chalk Paint a try.I purchased a sideboard last year with the intentions of refinishing it and with Thanksgiving behind me, spent the day on my latest project. Chalk Paint requires very little prep other than removing hardware and taping off any areas like inside the drawers or door area or for this piece the tile top.  On my piece the drawers are not removable so I had to paint them in place.  I chose to use a small 2" natural bristle brush but you can use foam brushes or even lint-free cloth to apply the paint.For this project I chose Annie Sloan's Chalk Paint in Graphite.I went with a thin first coat just to see how the product went on.You want to put the product on in a haphazard manor and you don't need to follow the grain but since I was planning on a second coat, I went with the grain for my initial coat. After my first coat, my project looked very streaky and you could still